Impossible Review

_MG_9020 (2)

Okay.  We’re going to get rather close here on the food blog because this food product changed my life.  I know that’s dramatic.  I’m sorry.  But hear me out.

If you are a new vegetarian struggling to stay away from the foods you know you want to avoid, if you’re a lifelong vegetarian/vegan and you want to indulge in some filthy junk food, this stuff is for you.

I used to be a fan of the Beyond Burger company.  Then they changed their recipe and added something to it that made it have a very strange lumpy texture.  I am disappointed because I liked the original formula/recipe/whatever it was.

If you want to know a little bit about me, there is a very specific craving I get every now and then.  I used to have double quarter pounders with cheese, plain, from McDangles and I loved them.  I was never a big meat eater, and since it’s been about 4 1/2 years since I’ve eaten beef on purpose (Taco Bell sometimes trolls me), I don’t exactly think I want to go back to it.

The Impossible Burger has been at Burger King for a while now and I’ve been so excited for it to come to stores.  Now that it has, I’m the happiest camper.

For dinner tonight, I made myself a double quarter pounder with cheese (Daiya American slices), and made my mom a regular quarter pounder.  My mom isn’t vegetarian, and regularly eats beef.  She said this was better than she ever expected it to be.

The cavewoman in me is mighty pleased.  10/10 I highly recommend this.

A caveat: as a treat.  Because this is essentially 12 dollars a pound where I live and that, my friends, is hella gross.  But I did buy four packs of it, three of which went into my freezer for later.

Last thing: I hope you’re all doing well.  The world is very uncertain nowadays, but we can keep working toward peace and understanding within each other.

Stuffed Peppers with Bulgar

_MG_8945 (2)

Small update: I bought a house.  I’m still learning the limitations of my kitchen and the space I have at the moment, but I’ll be up and running better soon.  This recipe is pretty flexible.  You can use just about anything in it you’d like to.  I went for a rather basic approach this time around.  Bulgar wheat for the grain, black beans and TVP for the protein, and corn to round it out with a bit of sweetness to offset the heat of the chipotle powder.  This whole thing comes together within half an hour and is perfect for meatless Mondays if you’re trying to reduce your consumption of meat.

Ingredients:

6 bell peppers, cut in half, or you can leave them whole and just cut the tops off.
3/4 cup TVP
1 can black beans, drained and rinsed
1 can sweet corn, drained and rinsed
3/4 cup bulgar, cooked (I made mine like pasta, and just drained through a fine mesh sieve)
1 tsp garlic and onion powder
1 tsp chipotle powder
1 tsp Better than Bullion paste (no chicken veg base) Or you can use vegetable stock, or just water.
1 1/2 tsp dried oregano
1 tbsp nutritional yeast
1/2 tsp ground coriander
1 tsp ground cumin
1 1/2 cup water
Salt to taste

Optional bread crumb toppin: 1 heaping cup of panko bread crumbs, 2 tbsp butter (I used Country Crock’s vegan butter).  Toast breadcrumbs in a skillet till golden brown, set aside.  I shredded in some Violife parmesan cheese as well.

Method:

Cook the bulgar and set aside.  In a large skillet, dissolve bullion paste in 1/2 a cup of water and add the TVP.  Allow this to cook over medium heat until the water is absorbed into the TVP, adding more water as needed to keep it from sticking.  Add in the remaining ingredients except the peppers and topping (if using) and mix well.  Cook for about five minutes until everything is fragrant and heated through.

In a shallow baking dish, spread peppers out so they are laying cut side up.  Fill each pepper half (or if you’re using the whole pepper, fill it entirely), leaving a little room at the top for the breadcrumb topping, if using.  Sprinkle with topping and bake at 375* F for 20 minutes, or until breadcrumbs are a deep golden color and the peppers are just starting to soften.

This recipe freezes well, and leftover filling can be used for multiple dinners as well.

Lentil Quinoa Patties

_MG_8751 (2)


A quick note before we get to the recipe: these patties are basic for the reason they can be used in many different ways.  You can easily customize them.  I will probably use some for taco “meat” later this week, and I’ll probably use some as “meat” for a spaghetti type sauce.  I wanted to have something basic and easy to make so I can have it on hand in case I needed to make something quickly.  These patties also freeze fairly well, but they will be crumblier once thawed out.

Ingredients:

2 cups cooked green/brown lentils (I cooked mine in Better than Bullion’s vegetable base)
1 1/2 cups cooked quinoa (Again, cooked in Better than Bullion’s vegetable base)
1/4 cup vital wheat gluten
2 tbsp oil of choice
salt and pepper to taste

Method:

Mash the lentils most of the way, leaving some for texture.  Stir in the quinoa, gluten, oil, and salt and pepper if using.  You can also use a gluten free binder if you’d prefer.  The gluten just helps hold the mixture together.  Measure out 1/3 cup portions onto a parchment lined baking sheet and form into rounds.  Bake at 375* F for 12 minutes, then flip and finish baking for another 7-10 minutes until both sides are slightly golden and the patties don’t squish when lightly pressed.  Cool completely on a wire rack for maximum crispiness.  Store in the fridge for up to a week, or freeze for up to a month.

Dressing for the salad above (not pictured, it wasn’t pretty):

2 tbsp peanut butter
1 tbsp maple syrup
2 tsp Sriracha hot sauce
2 tsp soy sauce
1 tsp sesame oil
1 tsp rice vinegar
1/4 tsp ground ginger
dash each of garlic and onion powder, black pepper
Splash of water to thin it out if desired

Whisk all ingredients together in a small bowl and pour over the salad.

Vegan Lasagna Roll-Ups

_MG_8330 (2)

Hello!  This week? Lasagna roll ups!  These are about the same amount of work as a traditional lasagna, but they’re individually portioned, making for easier serving and portion control.  Serve with salad for a complete meal.  See my notes at the bottom for clarification on ingredients.  Otherwise? Let’s get you rollin’.

For the tofu ricotta:

1 block of firm tofu, drained and pressed*
1/4 cup nutritional yeast
2 tbsp maple syrup
2 tbsp plant milk (I used oat)
1 tsp  salt
1/2 tsp each garlic and onion powder
1/4 tsp citric acid*

For the “meat” sauce:

1 cup of TVP*
1/2 cup of vegetable broth
1 15 oz can of tomato sauce
1 tsp of dried basil
1 tsp of dried oregano
1/2 tsp of salt
1/2 tsp of black pepper

Boil water and prepare 6 lasagna noodles according to package directions, cooking to al dente.  The pasta will finish cooking in the oven.

In a food processor, crumble the tofu and then pulse for about ten times.  Add in the remaining ingredients and process till the mixture is smooth.  Adjust for seasonings if you want more salt or more pepper, or add in more nutritional yeast if you’d like.  Honestly, this “ricotta” is the closest tasting to actual ricotta I’ve had yet, so I recommend making it as listed above.  Once it’s combined with the sauce and the pasta, the flavors work really well together.

In a small mixing bowl, combine the TVP and the vegetable broth and allow to rehydrate for about ten minutes.  Add in about 3/4 of the can of tomato sauce, and add in the remaining ingredients.  Combine, and set aside.

For the rolling, I used a baking sheet to hold the pasta so I wouldn’t make a mess on the countertop, but you don’t have to.  You’ll need a smaller baking dish for this, since there’s only six servings in this recipe.  I recommend glass.  If you want to make more, simply double the recipe and use a bigger baking dish.

Once the pasta is al dente, drain and return to the pot.  Take one noodle and lay it flat on the baking sheet (or countertop).  Spread the ricotta down first, using about 1/3 of a cup per noodle.  Spoon on some of the sauce, again about a 1/3 of a cup.  Roll from the bottom up, and place in a well greased baking dish.  Repeat with the remaining pasta till all is used.  You might have some ricotta left over.  Simply store in an airtight container in the fridge for up to five days.  Use the remaining tomato sauce in the can by mixing it with any leftover sauce in your mixing bowl.  Spoon onto each roll up.

I put some Daiya mozzarella style shreds on top of my roll ups, but you don’t have to.  Bake at 375* F for about 25-30 minutes.  Serves six.

You could also get this prepared and then freeze until ready to use.  I’d recommend only for a maximum of three months, though.

*Notes*

Ricotta:  Draining and pressing the tofu is a big step for this.  I usually don’t press my tofu, just squeeze as much water out as I can, but for this I pressed it.  Doing so gets rid of even more excess water and won’t make the tofu runny.  I also used citric acid because I didn’t want the flavor of lemon in my ricotta.  You absolutely don’t have to go out and buy citric acid to make this.  Use a tablespoon of lemon juice, or two teaspoons of apple cider vinegar instead.

Sauce:  Instead of TVP, you can use frozen “beef” crumbles, such as Gardein, etc.  Brown the crumbles first, though, before mixing into the sauce.  You can also use a jarred sauce you know you like instead of making the sauce above.  Personally, I don’t enjoy chunky sauces.

Roasted Poblano and Split Pea Soup with Sunchoke

_MG_8311 (2)

A few notes before we get started:

  1. You can roast the poblano in the oven at 400* F for about 10-15 minutes, or until the skin is blistering.  You won’t have the same char effect as you would if you held it with tongs over the gas stove.  The main reason for roasting the pepper is to remove the skin anyway.  Or as much of it as you can.
  2. You can leave out the poblano entirely if you’d prefer to have it less spicy.
  3. This soup thickens quite a bit after it’s cooled, and oddly looks like custard once it’s been in the fridge.  To reheat, simply add enough water to reach your desired consistency and either reheat in a saucepan or in the microwave.  This soup will also freeze for up to 1 month.

Let’s get into it.

Ingredients

2 quarts (8 cups) vegetable stock — I used Better Than Bullion vegetable base NOT their vegetarian chicken broth base.
1 1/2 cups split peas, sorted and rinsed
1 poblano pepper, minced once it’s been roasted and peeled
1 teaspoon black pepper
1 teaspoon liquid smoke (optional, but it adds a bacony flavor to the soup)
1/2 teaspoon oregano
1/2 teaspoon garlic powder
1/2 teaspoon onion powder
1/2 teaspoon smoked paprika

Taste for salt, add if needed along the way.  I didn’t need any extra salt with the Better Than Bullion paste.

Method

Bring stock to a boil in a large pot.  Add in all of the remaining ingredients and lower to a simmer.  Continue to simmer until peas are starting to mush together, almost like mashed potatoes.  I know it sounds gross, but it’s what I’ve got.  Puree part or all of the soup, or leave as is.  This serves four in normal portions, three in not normal portions.

For the sunchoke — otherwise known as the Jerusalem Artichoke:

This works for any size sunchoke, but I recommend only preparing as many as you plan on serving.  Clean thoroughly before placing on a baking tray.  Pierce with a fork a few times, and then bake at 375* F for half an hour.  The fork should go through easily, but don’t go all the way through.  Once sunchokes are fork tender, smash with the bottom of a glass and sprinkle salt and pepper on top, adding a small bit of butter as well, if desired.  Put back in the oven for another 7 minutes before removing the tray and flipping the sunchokes over (carefully), and finish baking for the remaining 7 minutes.

Serve without intending for leftovers.  They don’t hold up well in the fridge after 2 days.

Seitan Roast with Sides

Hello!  Happy new year!  I hope you are doing well, and I hope your food goals are going well, too.  If you’re participating in Veganuary, congratulations, I hope you succeed.  I also like to remind myself that when I’m trying a new thing and I have a slip up, it isn’t the end of everything and I just pick up where I left off.

This post is a long one, but I wanted to start the year out with a bang.  It’s all mostly recipes with a few notes for one or two of the recipes.

That said, let’s just get right in to the recipes.  Seitan roast, warm fennel and apple salad, ginger carrot and red cabbage salad, and a pomegranate reduction for the roast.  There’s also peas on the plate, but I just steamed those.  If you need a recipe for steamed peas, please let me know.

_MG_8248 (5)

Seitan Roast

Note: if using plain vegetable broth/stock, add in more salt than you think you might need.  Seitan is very easily bland, so adding in about 2 teaspoons of salt will help make it not be bland.  I know that sounds like a lot, but you’re making up the difference from a bullion cube or paste.

Ingredients

Dry:

2 1/2 cups vital wheat gluten (no substitutes, sorry 😦 )
1/4 cup nutritional yeast
1 1/2 tsp each garlic and onion powder
2 tsp black pepper
1/4 tsp salt (see note if using vegetable stock instead of water)

Wet:

2 cups warm water
2 tbsp oil of choice (I used olive)
1 heaping tbsp bullion paste or 2 bullion cubes (I use Better than Bullion No Chicken base)
1 tbsp white wine vinegar (or regular white vinegar)
1 tbsp maple syrup or other liquid sweetener

Method

Whisk dry ingredients together to distribute everything equally.  In a separate bowl (or, like I do, use a glass measuring cup), mix together the wet ingredients.  There will be separation of the oil, so don’t worry, it’s normal.  Add your wet to your dry and stir to combine.  A soft dough should begin to form.  This will be wet, but it shouldn’t be shaggy (where it easily pulls apart and stringy).  Once you get a ball to form and all of the vital wheat gluten is mixed in, start kneading inside the bowl.  Knead for about 2-3 minutes, or until it becomes a bit firmer.  You shouldn’t be able to pull it apart very well at all at this point.  Let the dough rest for about five minutes.  Press the dough into a rectangle (I did this on a baking tray for easy counter clean up) and then roll into a log.  Wrap in parchment as tightly as you can without ripping the parchment.  Roast at 325 degrees F for one hour in a roasting pan  with 1/4 cup of water in the bottom.  I used foil balls to elevate the seitan above the water so it wouldn’t soak into it.  It will act as steam though, so it will evaporate a little as the seitan cooks.  Let cool for about half an hour so the seitan can set.  If it gets too cooled down, slice the seitan and then warm in a skillet with some butter or oil till golden brown.

Freeze leftover seitan in portions for up to 3 months.  Leftovers can be used for anything you’d like, really.

Warm Fennel and Apple Salad

Note: Slice the apple while the shallot is browning in order to lessen the oxidization of the apple.

Ingredients

1 bulb of fennel, thinly sliced
1 Granny Smith apple, thinly sliced
1 shallot, minced
Juice of 1 orange
Salt and Pepper to taste

Method

In a large skillet, melt 2 tbsp butter (or use oil).  Cook the shallot till it browns, then add in the fennel and apple.  Cook down for about 5-7 minutes, flipping every now and then to ensure even cooking.  Add in orange juice and salt and pepper and continue cooking for another 3-4 minutes.

Ginger Carrot Red Cabbage Salad

Note: This is a small batch worth because I didn’t want to make too much since it’d be me eating most of it.  To make a full head of cabbage, just double the dressing recipe.  I know it might not seem like enough, but trust me, it will be.

Ingredients

1/4 of red cabbage, shredded
1-2 carrots, shredded

Dressing:
1/4 cup red wine vinegar
1/8 cup olive oil
1 1/2 tsp ground ginger
1 tsp lemon juice
salt and pepper to taste

Method

In a medium bowl, toss together the carrot and cabbage.  In a small bowl, whisk together the dressing ingredients until thoroughly combined.  Pour over the carrot and cabbage and toss until salad is coated.  Set in the fridge until serving.

Pomegranate Reduction

In a small saucepan, bring 8 ounces of pomegranate juice and 1/2 tsp of maple syrup to a rapid boil, then lower the heat to a simmer until liquid reduces by half.  Mixture will thicken as it cools.  Spoon over seitan roast at the table, or can be used before slicing the roast.

Vegan Carbonara with Tofu Pancetta

65112512_343438199671187_7157521479335149568_n
photo by c.m.k.

Happy Friday!

Today we’re talking carbonara.  Minus the eggs.  I’ve tried other recipes before, and found they lacked the same mouthfeel straight-up carbonara has, and I think I’ve cracked the code.

The secret to this sauce is aquafaba.  Using that mimics the feeling eggs give this sauce.  Add a few other flavorings and you’re all set for a classic good time.  We’re not going to go into a huge story here, just the recipe.  Perfect for a quick lunch or midweek dinner.  Serve with a salad on the side, and you’ve got an easy entertaining meal for friends on the weekend.

Vegan Carbonara

1 1/3 cup aquafaba
1/2 cup unsweetened plant milk
1/2 cup nutritional yeast
1/4 cup olive oil (or other neutral flavor)
1/2 tsp onion powder
1/2 tsp garlic powder
1/4 tsp salt (or to taste)
1/2 tsp white miso paste (optional, but highly suggested)
1/2 tsp black pepper (seems like a lot, but please feel free to use to your preference)

Heat aquafaba to simmering.  Add in remaining ingredients and heat to a slow boil.  Reduce back to a simmer, and allow to simmer for fifteen minutes.  Add sauce to al dente pasta and continue cooking till pasta has absorbed sauce.

Tofu Pancetta

1 block of extra firm tofu, drained and pressed

65296270_2363877826991675_8328824026629668864_n
photo by c.m.k.

2 tbsp liquid smoke
1 tbsp worcestershire sauce (vegan friendly)
1/3 cup soy sauce/tamari
black pepper to taste
2 tsp sweetener of choice (I used maple syrup)
3 tbsp oil for frying

Small dice the tofu into cubes.  Mix marinade (liquid smoke, worcestershire sauce, soy sauce, sweetener, black pepper) in a shallow baking dish.  Add tofu and allow to marinate for at least thirty minutes, but longer is fine.  I’d say overnight if you can manage it.

Line on a baking tray and bake for 15 minutes at 375* F.  Let rest for a few minutes before tossing in a skillet with reserved 3 tbsp oil, 2 tbsp soy sauce, 1 tbsp worcestershire sauce, and 1 tsp liquid smoke.  This just seals in more flavor.

Serve with your carbonara for a bit of salty crunch with your pasta.  If you don’t want to use all of the pancetta for your pasta, it works well on top of salads, and could also be used as bacon bits for potatoes.

I hope you enjoy!

No Chicken Patty

_MG_1812
Photo by Chelsea M.K.

When it comes to burgers, I don’t really find the options for vegetarian burgers to be very appetizing.  Not that I like the texture of meat, but I need something with a bit more chew than most offer.  I’ll be honest, I don’t like to purchase the pre-made grillers out there, even though I have some in the freezer right now.  It all goes back to my biggest pet peeve with myself — convenience food.

If it’s an easy thing to pop in the microwave, or rip open a package and there’s my food, I have a love hate relationship with it.  My love is the ease in which I can feed myself.  Unless I use canned goods like beans, or frozen vegetables, preparing a meal often takes a while, and I’m usually tired when I’m hungry.  Snack foods are always a good option, but again those can be highly processed or contain things I can’t pronounce even if they are on a vegan labelled snack.

I set out a while ago to create a mock chicken patty to give me that chew of a burger I miss.  After several failed attempts, I finally managed to create something edible.  I’d even go so far as to say it’s delicious.  I can pronounce all of the things in it.  And there’s even a gluten free option!  You can have your burger and eat it, too.  Or something.

_MG_1845
Photo by Chelsea M.K.

I do have a few notes about this recipe, though, and I’d share my actual page where I made them because you can see me devolving into “I’m not sure what this is anymore” on some earlier stages.  For the gluten free option, the batter will be firmer and needs to cook longer.  I absolutely do not recommend baking the gluten free one.  It came out dry and gummy all at once, and that was something I can’t ever say I want in my mouth again.  Frying these will give it a lovely golden brown color that makes it all even more appealing.  Patience is key in this recipe because even though it takes a while, the payoff is worth it.

I think the seasoning in it makes it great without a sauce and just lettuce and tomato keep it simple, but delicious all the same.  I’ve been having it with some Daiya slices as well–the cheddar and American–and it doesn’t distract from the flavor of the food.  Without further ramblings, I give you the no chicken patty.

_MG_1839
Photo by Chelsea M.K.

No Chicken Patty (with Gluten)

1 cup TVP (textured vegetable protein)
2 cups vegetable broth (I used Better Than Bullion’s No Chicken Base)
2 cups flour
3 tbsp vital wheat gluten (you can leave this out, just add about 1/4 cup more flour)
1 tsp worcestershire sauce (vegetarian friendly)
2 tsp poultry seasoning (no meat in it, just the herbs and spices)
1/2 tsp onion powder
1/2 tsp parsley
1/4 tsp garlic powder
1/4 tsp salt (you can adjust the salt to your taste, but if you use the BTB base, it’s pretty salty already)
4-5 tbsp oil for frying (I used straight up vegetable oil)

Method:
1. In a large mixing bowl, combine the vegetable broth, worcestershire sauce, and TVP.  Let sit for about ten minutes for the TVP to hydrate.
2. Add in the flour, wheat gluten (if using), and seasonings.  Stir to combine.  This will make a sort of wet batter, but that’s okay.
3. Heat the oil in a large skillet and when the pan is ready, scoop 1/2 cup of the batter into the oil.  Spread the batter into a single layer, maybe 2 inches in diameter.  You can make square patties if you’d like, but the circular ones fit better on a bun.
4. Cook for 3-5 minutes, or until the top starts to dry out.  Check to see if the bottom is golden brown, and then flip the patties to continue cooking on the other side.
5. Remove from the pan and allow to drain on a wire rack.  Add more oil to the pan if necessary and continue to cook till all the batter is used.
6. Serve immediately, or let cool completely before storing in the fridge for 5-7 days.
7. These will bake moderately well if you’d prefer not to fry.  Oven at 375 F for 10 minutes, flip, then five more minutes.  They don’t brown as nicely as frying, but they still taste fine.

No Chicken Patty (Gluten Free)

Ingredients are the same as above, minus the flour and vital wheat gluten.  Instead, add 2 1/2 cups of rice flour (plain rice flour), and 1/4 cup of oil (your choice, I used grapeseed).  The batter will be firmer, and lighter in color.

To cook, simply cook 5-7 minutes on one side, then flip and continue cooking till the other side is golden brown.  A little longer on the cooking process, but tastes just as great.

Meat Free Chickenless Tenders – Review

IMG_20190120_143218.jpg

ALDI is an internationally known grocery store chain, and recently they’ve come out with a line called “Earth Grown.”  This is a group of products that are vegetarian/vegan friendly meat-like substitutes.  So far, I’ve had their meatballs, the soy protein burgers, the chickenless patties, and now the chickenless tenders.

What I like about these products is they have a clear list of ingredients on the box, but they also have a very big “VEGAN” spot right on the front.  There’s no question what’s vegan friendly or not.

I prepared them using the recommended method, in the oven for 16 minutes, flipping halfway.  In terms of texture, they were very similar to regular frozen nuggets, but they were kind of greasy.  They didn’t taste too much like chicken, and honestly reminded me of fish sticks?  I don’t know.  They weren’t bad!  But I think I prefer the Quorn nuggets in terms of texture.  Morningstar is always a good choice, too.

Price wise?  These are 50 cents to a dollar cheaper than other brands.  And combined with the flavor, I’d say these are a re-purchase item.

I give this an 8/10.

Quorn vs Tofurky/Veganuary

Wow, well, I disappeared for a bit there, didn’t I?  I work in a production plant and since it centers around stuff people want for the holidays, we were slammed with a lot more orders than we were expecting.  That said, I decided this year to try out two different holiday roasts by Quorn and Tofurky, respectively.

I purchased two roasts at the same time since they were on sale, and I have to say I wouldn’t purchase them again if they weren’t on sale.  Not to say they weren’t worth the price, but I definitely don’t have spare cash lying around.  That is one of my nitpicks with the vegan/vegetarian meat substitutes.  Even tofu can be expensive if you want a certain kind.  If it’s made with plants, why is it so expensive?  Well, the more processed it is, the more it costs, right?  Except not always.  I’ve noticed animal product… products don’t have the same issue.  Boxes of macaroni and cheese can be purchased for less than a dollar, while Daiya (which I’m not all too fond of, if I’m honest), is usually above 2 or 3 dollars.  I know there are homemade versions of a lot of the processed vegetarian foods, but I’m all about convenience.  I know this has nothing to do with what I said I’d talk about, so let me get back to the topic at hand.

I bought the Quorn turkey style roast for Thanksgiving.  It looks like this (image borrowed from amazon.com):

51DpwvD91QL._SY400_

Rating: 6/10

The texture was pretty spot on for how I remember turkey.  I know there are vegetarians who don’t like the texture of meat, so if you’re one of those people, I’d avoid this.  It’s got the flavor of cafeteria turkey sandwiches from high school.  It didn’t really remind me of turkey flavor too much, as from what I remember, turkey’s pretty bland unless you brine it or put a ton of gravy/cranberry sauce on it.

This roast isn’t vegan (they used dehydrated egg whites), or at least here where I live it isn’t.  I know the Quorn brand does make some vegan foods, but where I am, unless I travel to a bigger city, I don’t get that option.

The Tofurky brand roast was . . . interesting.  It looks a little bit like this (image taken from Vegan Essentials):
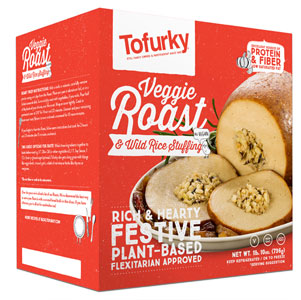
TofurkyRoastLG1

Rating: 7/10

This one was interesting because as you can see on the package, it shows a little bit of stuffing in the center, with a lot of, well, meat.  Mine was mostly stuffing, which wouldn’t have been too bad except I didn’t find the stuffing to be particularly good.  I wanted more of the turkey.  I’d say if the roast had the texture of Quorn’s, but the flavor of Tofurky, it would have been perfect.

There are a lot of vegetarians who say Tofurky has a distinct flavor to it, and it does.  It’s got that vital wheat gluten flavor in the background, because while they do produce mostly soy stuff, the gluten gives it the texture of meat.  Much like a seitan.

I did have leftovers from both, and while the Quorn roast was all right on day two, I made the most epic leftover sandwich with the Tofurky after I sliced it.  I used the So Delicious Cheddar Jack and some Veganaise on two slices of Dave’s Killer Bread (with some Sweet Baby Ray’s to round it out).  Best sandwich I’ve had as a vegetarian.  No lie.

If I had to choose between the two, I’d go with the Tofurky one.  Both had issues for me that would make it difficult to repurchase either one, but if I was told I had to, it’d be Tofurky.

Changing gears a little bit, I’m going to discuss my food plan for the month of January.  Please pardon me if this post gets a bit lengthy.  Food is something I have a weird relationship with, as I’m sure a lot of people do.

For January, I’ve challenged myself to participate in Veganuary.  For those who don’t know, Veganuary is where you spend the month of January living the vegan way, which is more easily explained on the Veganuary website.  You can sign up to pledge, get a starter kit, and there’s just a whole lot of information you can get there.

My goal is to maintain a strict vegetarian diet, and eat far less processed sugar.  I know that’s literally not vegan, but I don’t consider myself a vegan.  I consider myself a vegetarian.  So for me, the challenge will be eating little to no animal products such as eggs and/dairy.  I say little to no because I purchased some meat free sausage recently that has egg whites in it.  I’m not going to throw away food I already have because that seems a bit un-vegan to me (in the low waste sense).

I’m not a vegan because I use plastic bags and paper towels at home.  I have sometimes eaten cheese and eggs.  My reasons for this are my own, and I feel like a lot of people judge others for the way they eat which is really disturbing to me.  Like I said, I work in a production plant and not very many people know I’m vegetarian.  I don’t go around spouting it because it’s my personal business and if we happen to have a free food day where there’s nothing I want to eat, then I don’t eat it.  I don’t stand in line saying it’s rude they don’t have food for me.

It really is something appalling when I watch my favorite YouTubers and the comments are filled with people saying “I can’t believe you call yourself vegan when you _______.”

Who are we to judge other people for how they live their lives?  It all goes back to the whole treat others the way you want to be treated, and it reflects poorly on ourselves if we say we’re all about saving the world when we’re horrid to each other over something as simple as food.

So, my personal goal, like I said, is to stick to a purely vegetarian diet.  I’m excited to try it out and see how far I can go.  Who knows, I might be able to keep it going after January.

TL;DR — Tofurky’s better, I’m doing Veganuary on my own terms.